




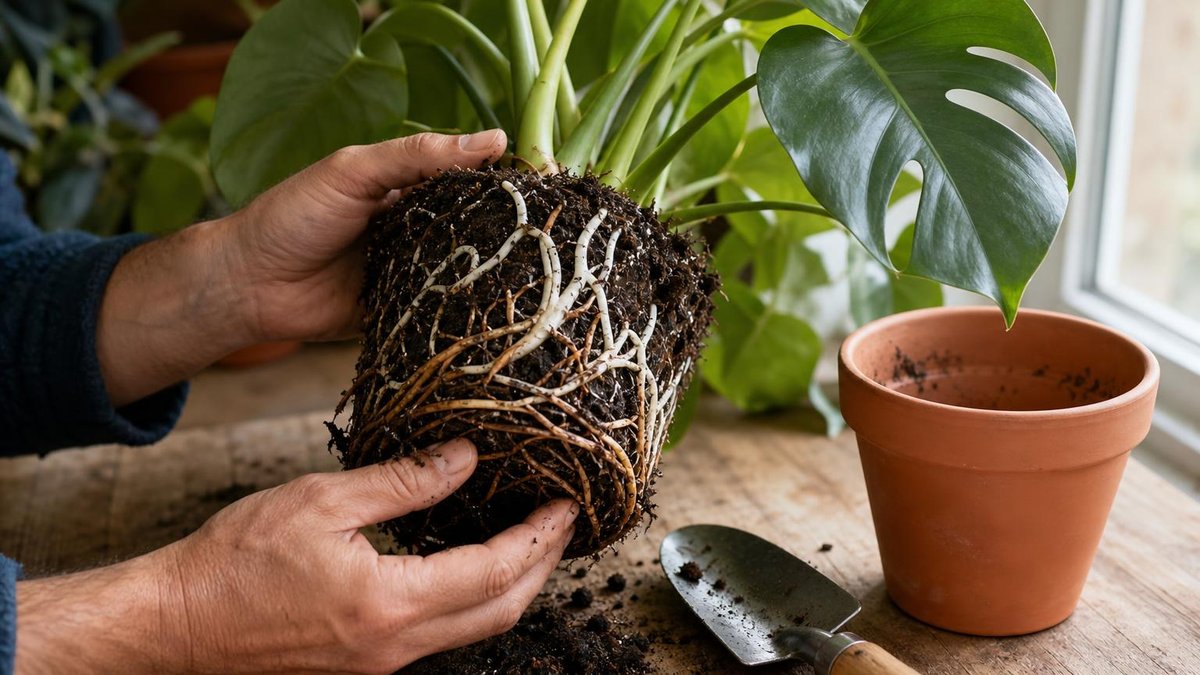
Root rot is the most common killer of potted houseplants, and it is almost always caused by overwatering rather than a mysterious disease. When soil stays saturated for too long, oxygen levels around the roots collapse and opportunistic pathogens such as Phytophthora, Pythium, and Fusarium multiply. The roots suffocate, then decay. The key to saving a plant is recognising the early signs of root rot and acting before the entire root system turns to mush. This guide covers what root rot looks like, how to fix root rot in different species, and when the damage is too advanced for home treatment.
What does root rot look like
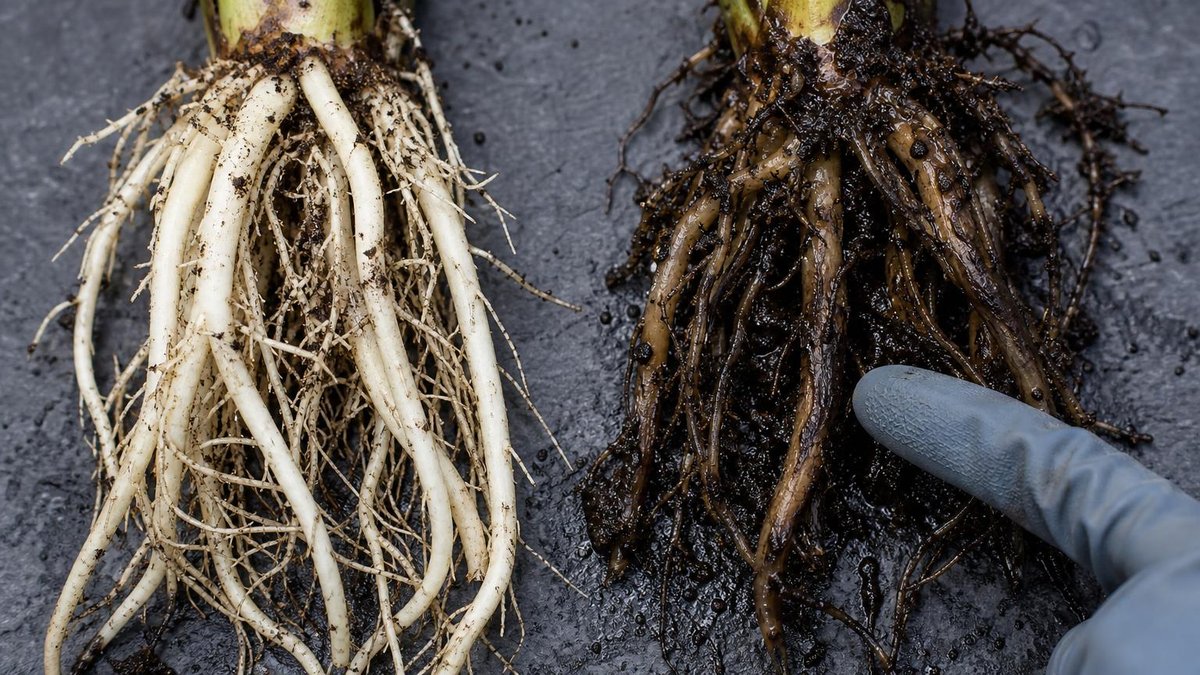
Healthy roots are firm, pale, and often white or cream-coloured with a slightly moist surface. Rotting roots turn brown or black, feel soft or slimy to the touch, and may separate from the plant with gentle pulling. The smell is unmistakable: a sour, fermented odour rather than clean earth.
Above the soil line, the symptoms can be misleading. Leaves yellow, wilt, or drop despite wet soil. New growth stalls. In advanced cases, the stem base turns soft and dark. These symptoms overlap with other problems, so you must inspect the roots directly to confirm root rot.
The table below compares root rot vs healthy root characteristics using descriptions from the Royal Horticultural Society (RHS) plant pathology guidance.
| Characteristic | Healthy Roots | Root Rot |
|---|---|---|
| Colour | White, cream, or pale tan | Brown to black |
| Texture | Firm, plump, slightly moist | Soft, mushy, or slimy |
| Structural integrity | Hold shape when handled | Disintegrate or pull away easily |
| Odour | Earthy, clean soil smell | Sour, rotten, or fermented |
| Response to washing | Remain intact under gentle water | Break apart or release dark liquid |
Source: RHS, Root diseases of houseplants [VERIFY].
How to fix root rot: step-by-step treatment
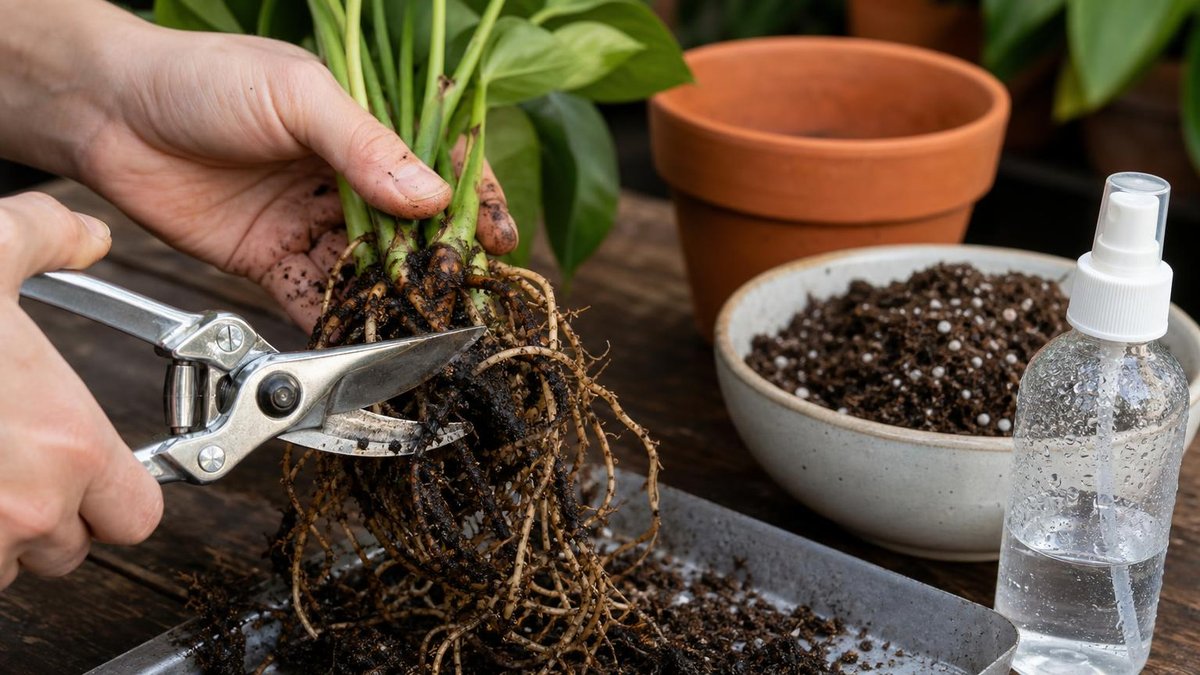
Root rot treatment succeeds only if some healthy root tissue remains. If the entire root system is black and mushy, the plant cannot recover and should be discarded to prevent pathogen spread. For plants with partial damage, follow this protocol developed from University of California Integrated Pest Management (UC IPM) and RHS recommendations.
Step 1: Remove the plant and inspect
Tip the plant out of its pot. Gently shake or wash away old soil under lukewarm running water. Examine every root. Healthy tissue may exist even when the outer roots are ruined; look for pale, firm strands near the crown.
Step 2: Prune all rotted tissue
Using sterilised scissors or pruners (wipe blades with 70% isopropyl alcohol between cuts), remove every soft or discoloured root. Cut back to firm, pale tissue even if this means removing 80% of the root mass. Also trim any yellowed or soft leaves to reduce demand on the remaining roots.
Step 3: Disinfect remaining roots
Soak the trimmed root system for 10 minutes in a solution of one part 3% hydrogen peroxide to three parts water. This kills surface pathogens without damaging healthy tissue. Rinse with clean water afterwards.
Step 4: Repot in fresh, appropriate mix
Discard the old potting mix completely; do not reuse it. Sterilise the pot with a 10% bleach solution for 10 minutes, or use a new container. Choose a potting mix matched to the species:
- Monstera and general foliage: peat-free houseplant compost with 20-30% perlite or orchid bark for drainage
- Snake plant (Sansevieria): cactus and succulent mix, or standard compost with 40-50% grit or perlite
- Orchid: dedicated orchid bark mix, never standard potting soil
Repot at the same depth as before. Do not water immediately; let the cut surfaces dry for 24 hours to reduce reinfection risk.
Step 5: Adjust watering practices
Water only when the growing medium has dried appropriately for the species. For most tropical houseplants, this means the top 5cm (2in) of soil is dry. For snake plants, allow the full depth to dry. For orchids in bark, water when the bark feels dry and the roots silver-grey. Use your finger, not a calendar.
For more detail on preventing root damage during repotting, see our guide on how to repot your plants without causing root damage.
Species-specific guidance
Monstera root rot
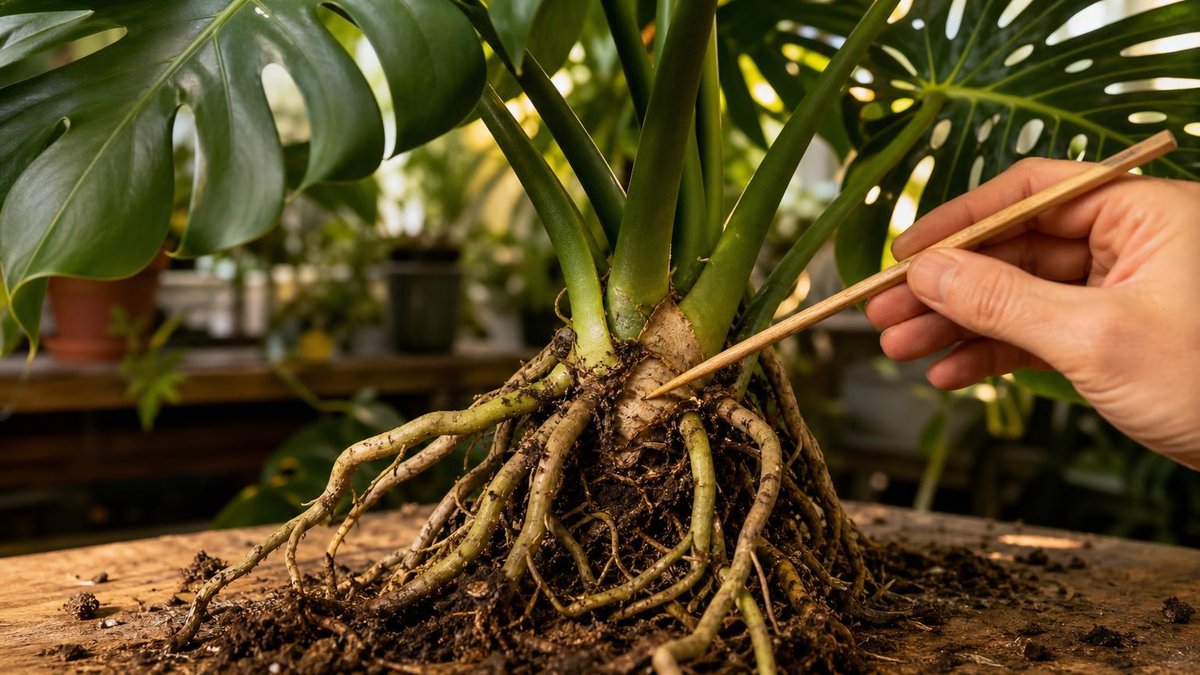
Monstera deliciosa tolerates moist conditions but not waterlogging. Its thick aerial roots often mask crown rot until the stem base collapses. When treating monstera root rot, check the stem where it meets the soil; if this tissue is soft, propagation from a healthy cutting may be the only option. Cut below the rot, let the wound callus for 48 hours, then root in water or moist sphagnum.
Snake plant root rot
Snake plants store water in their leaves and are highly susceptible to rot in standard potting mix. The first sign is often leaf base softness rather than obvious wilting. When you unpot, the thick rhizomes may be intact even when finer roots have rotted. Trim roots back to firm rhizome, dust the cut with powdered cinnamon as a mild fungicide, and repot in extremely gritty mix. Water no more than every 3-4 weeks in winter.
Orchid root rot
Phalaenopsis orchids in bark mixes develop root rot when the bark degrades and retains water, or when they are potted in moss that stays wet. Healthy orchid roots are thick, silvery when dry, and green when wet. Rotted roots are thin, brown, and papery. After pruning, repot in fresh bark only; never use soil. Reduce watering frequency in winter to every 10-14 days. Our guide on how to grow orchids in water explains alternative hydration methods that eliminate bark degradation issues.
When to call a professional
Home root rot treatment has limits. Contact a professional plant care service or horticulturist if:
- The plant is large, valuable, or sentimentally important and you are uncertain about pruning severity
- The rot extends into the crown or stem, requiring propagation rather than simple repotting
- You suspect a greenhouse or collection-wide outbreak of Phytophthora or Pythium, which require laboratory diagnosis and professional fungicide application
- The same plant has rotted twice despite corrected watering, indicating a possible systemic infection or unsuitable growing environment
Do not attempt to use commercial agricultural fungicides indoors without training; many are not labelled for residential use and pose inhalation risks.
Preventing root rot recurrence
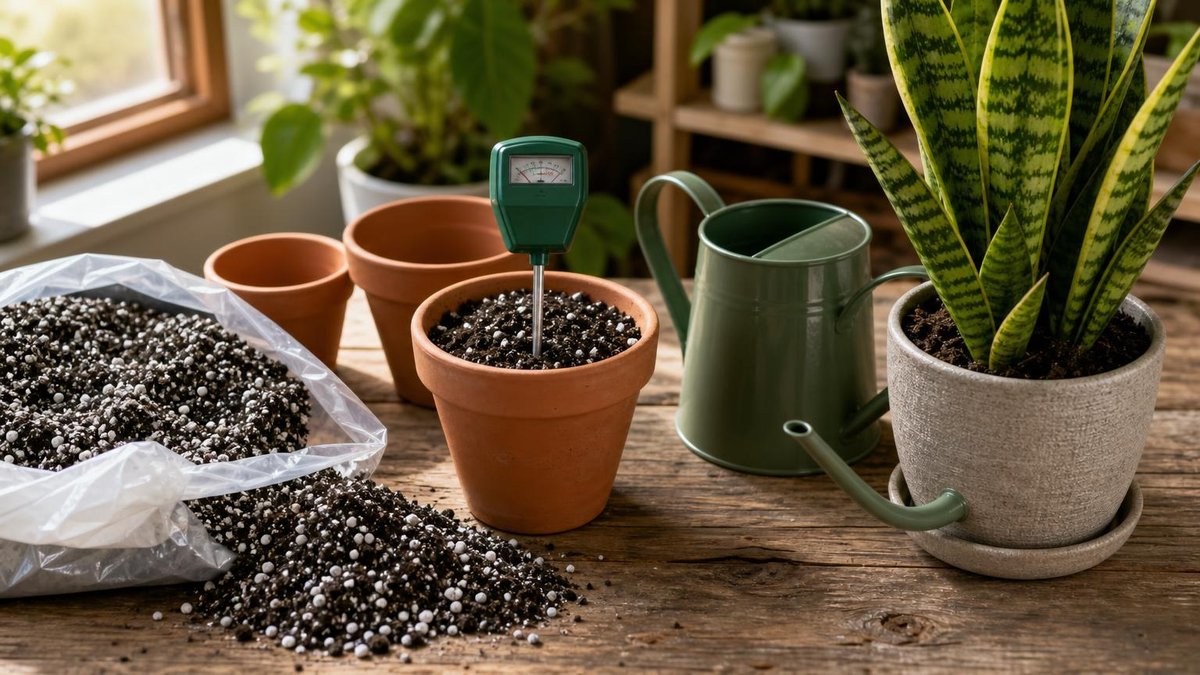
Prevention depends on controlling moisture, oxygen, and pathogen introduction. Apply these practices consistently:
- Use pots with drainage holes; decorative cachepots must not hold standing water
- Match pot size to root mass; excess soil stays wet longer
- Adjust watering to season, light level, and temperature; plants in cooler rooms need less water
- Repot every 2-3 years to refresh degrading mix, or annually for orchids
- Quarantine new plants for 2-3 weeks to prevent introducing pathogens to your collection
For broader context on watering mistakes, read our article on signs your indoor plants are overwatered and how to fix it.
Frequently asked questions
Diagnosis and early signs
What does root rot look like on a plant I haven’t un-potted yet?
Above-ground signs include yellowing lower leaves, wilting despite wet soil, stunted new growth, and a musty smell from the pot. These symptoms are not definitive; you must inspect the roots to confirm. If the soil has been wet for more than two weeks and the plant looks distressed, un-pot and check.
Can root rot heal on its own if I just stop watering?
No. Once pathogens have colonised root tissue, the decay continues without intervention. Drying the soil may slow spread, but damaged roots will not regenerate. You must remove rotted tissue and repot in fresh, pathogen-free medium.
Treatment and recovery
How long does root rot treatment take to show results?
New root growth typically appears 2-4 weeks after treatment, visible as white tips emerging from the stem base or remaining roots. Leaf recovery is slower; yellowed leaves will not revert to green but should stop progressing. Full establishment takes 6-8 weeks for most tropicals, longer for slow-growing species like snake plants.
Should I use rooting hormone after pruning rotted roots?
Rooting hormone can stimulate new root development on plants with severely reduced root systems. Apply to clean, dry cut surfaces before repotting. It is most beneficial for woody-stemmed plants and orchids; succulent-rooted plants like snake plants rarely need it.
Can I save an orchid with no roots left after root rot?
Yes, if the crown and leaves are healthy. Phalaenopsis orchids can be revived through water culture or sphagnum propagation. Place the base in humid air until new aerial roots emerge, which takes 4-8 weeks. Maintain 18-24°C (64-75°F) and indirect light during recovery.
Is hydrogen peroxide safe for all plants?
A 1:3 dilution of 3% hydrogen peroxide is generally safe for houseplants when used as a brief soak. Sensitive species with very fine roots may show minor damage; reduce concentration to 1:6 for these. Never use undiluted peroxide.
How do I tell root rot vs healthy roots in an orchid with silvery aerial roots?
Healthy aerial orchid roots are firm and plump even when silver; they green up within minutes of watering. Rotted orchid roots stay brown or black, feel hollow or papery, and may have a flattened, shrivelled appearance even when wet. The velamen on healthy roots grips the inner core; on rotted roots, it slips off easily.
Sources
- Royal Horticultural Society (RHS). Root diseases of houseplants. https://www.rhs.org.uk/disease/root-rot
- University of California Integrated Pest Management (UC IPM). Phytophthora root and crown rot in ornamentals. https://ipm.ucanr.edu/PMG/PESTNOTES/pn74133.html
- University of Florida IFAS Extension. Orchid diseases: Identification and control. https://edis.ifas.ufl.edu/publication/PP286
- American Society for the Prevention of Cruelty to Animals (ASPCA). Pet poison control. https://www.aspca.org/pet-care/animal-poison-control
- Kew Royal Botanic Gardens. Houseplant care: Watering and drainage. https://www.kew.org/learn/visit-kew-gardens
