




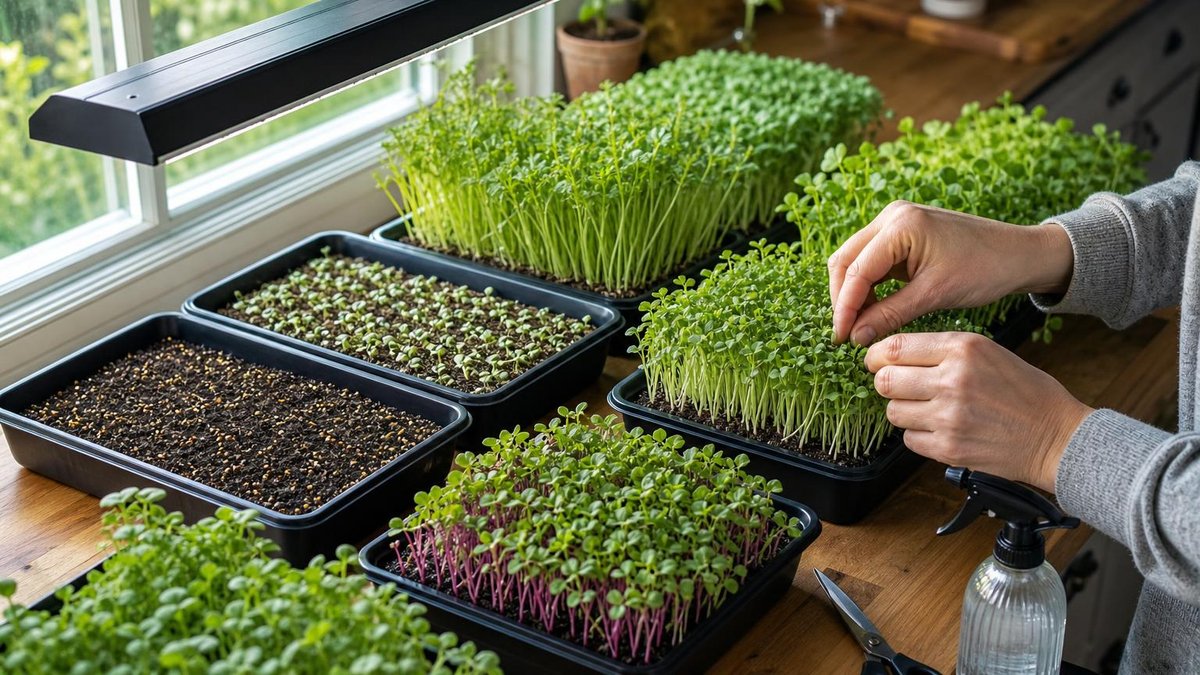
Microgreens deliver mature-plant flavour in 7 to 21 days from sowing. That’s among the fastest edible crops you can produce. The process rewards precision over space; a windowsill is enough. This guide covers how to grow microgreens from substrate selection through harvest, with measurements and timelines drawn from university extension research.
What defines a microgreen
The USDA and academic researchers define microgreens as young, tender seedlings harvested at the cotyledon stage or with the first true leaves just emerging. This distinguishes them from sprouts (germinated seeds eaten whole, root and all) and baby greens (older, larger plants).
The distinction matters for food safety. Microgreens grow in light with leaves exposed. Sprouts develop in dark, humid conditions that carry higher bacterial risk.
Common species include brassicas (broccoli, kale, mustard), amaranths (red amaranth), chenopods (beet, spinach), and apiaceae (cilantro, dill). Broccoli microgreens typically reach harvest at 2.5 to 5cm (1 to 2 inches) in 7 to 10 days. Cilantro may need 14 to 21 days due to slower, irregular germination.
Substrate options: soil versus hydroponic
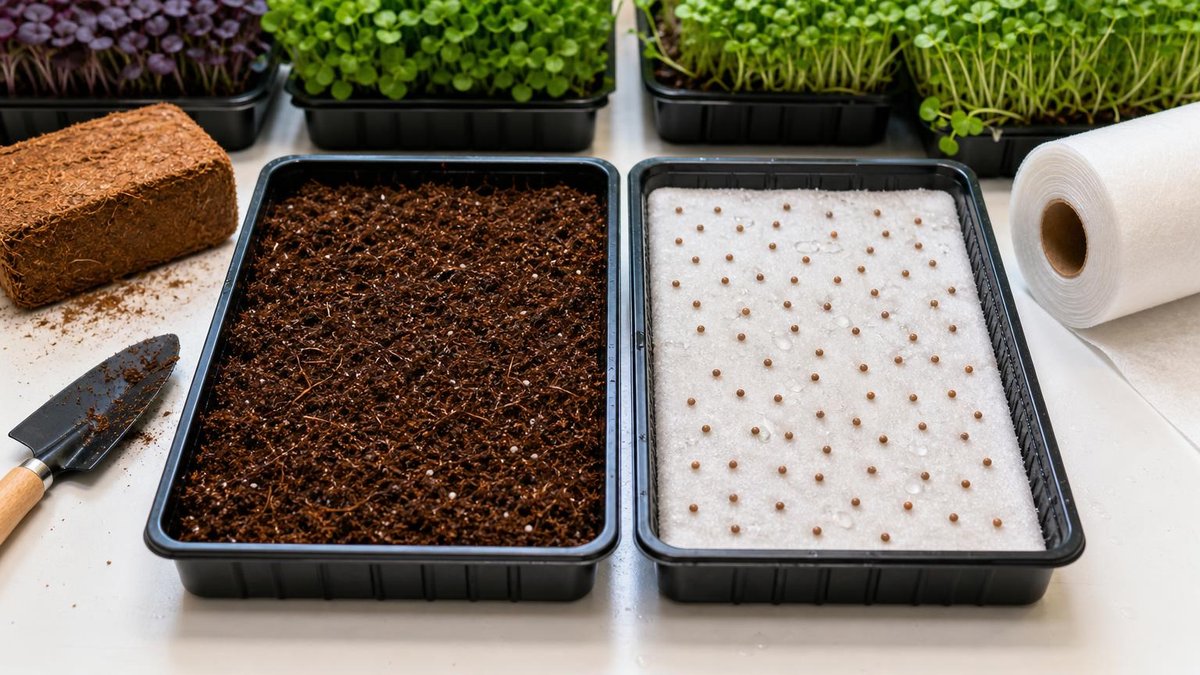
Your substrate choice determines watering frequency, nutrient availability, and whether you need how to grow microgreens without soil methods. Both approaches work. The better option depends on your space, budget, and tolerance for mess.
| Factor | Soil or soilless mix | Hydroponic (mat or felt) |
|---|---|---|
| Typical depth | 2.5 to 5cm (1 to 2 inches) | 3 to 6mm (1/8 to 1/4 inch) mat thickness |
| Water retention | High; buffers against drying | Low; requires twice-daily checks |
| Nutrient source | Compost or vermiculite in mix | None needed for 7 to 10 day crops; liquid fertiliser for longer crops |
| Post-harvest cleanup | Compostable; some mess | Mats disposable; minimal mess |
| Root rot risk | Moderate if overwatered | Low with proper drainage |
| Best for beginners | Yes; forgiving of errors | No; requires precise moisture management |
For first-time growers, a fine-textured peat-free seed compost or coconut coir mix offers the most forgiving entry point. If you choose how to grow microgreens hydroponically, use unbleached hemp or jute fibre mats rather than synthetic felt, which can shed microplastics.
Equipment for home production
You need less equipment than most kit manufacturers suggest. The essentials are:
- A shallow tray with drainage holes, 2.5 to 5cm (1 to 2 inches) deep; standard 1020 nursery trays work
- A solid tray underneath to catch runoff
- Substrate: seed compost, coconut coir, or hydroponic mat
- Seeds labelled specifically for microgreen production (food-grade, untreated, high germination rate)
- A spray bottle for surface moisture during germination
- Light source: south-facing window minimum, or supplemental LED for consistent yields
A microgreens grow bench becomes relevant only at production scale. For home use, any level surface near light suffices. If you expand to multiple trays, a wire shelving unit with adjustable shelves and clip-on LED fixtures provides efficient vertical space use.
Seed density is critical and species-specific. Broccoli seeds require roughly 10 to 15g per 1020 tray (approximately 30 x 53cm or 12 x 21 inches). Cilantro needs heavier sowing at 25 to 30g per tray due to lower germination rates. Over-sowing causes poor air circulation and damping-off disease; under-sowing wastes substrate and light.
Step-by-step sowing and germination
- Moisten substrate until uniformly damp but not saturated; water should not pool when you press a finger into the surface.
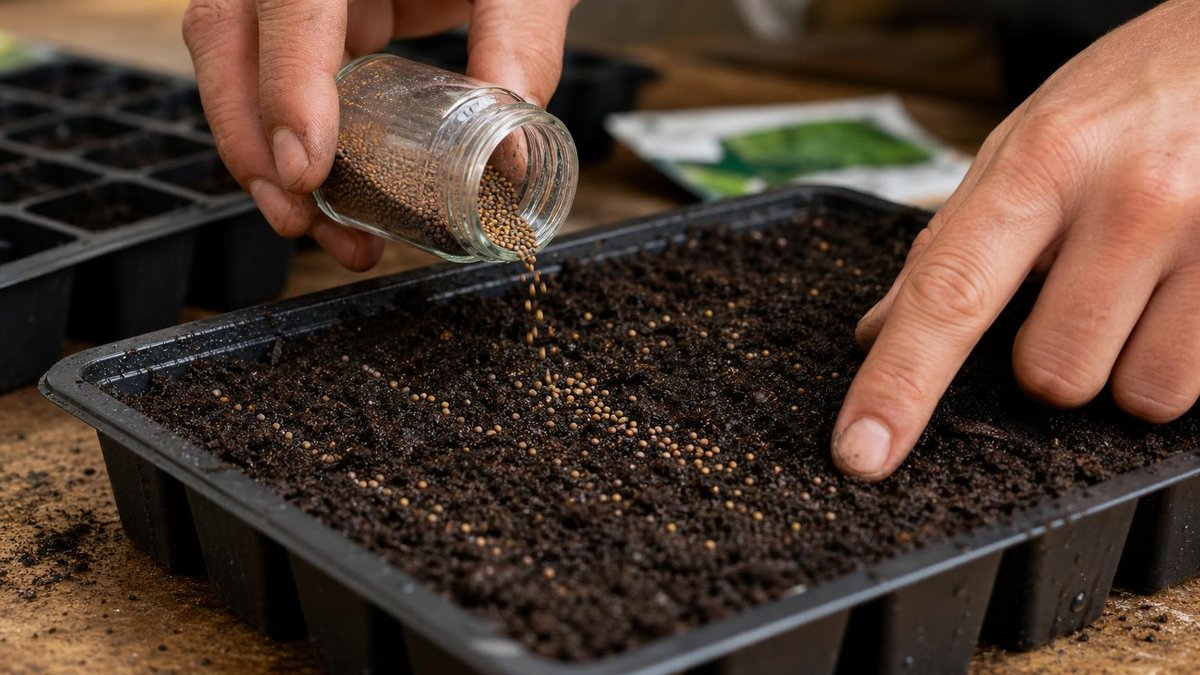
- Spread seeds evenly across the surface; for small seeds like broccoli, use a shaker jar or sieve. Do not bury them; microgreens need light contact or surface placement.
- Press seeds gently into the substrate with a flat board or your palm to ensure good moisture contact.
- Cover the tray with a second inverted tray, or with clear plastic domed lid, to maintain humidity. Exclude light for 2 to 4 days during germination (the blackout period).
- Check daily; when radicles appear and stems begin pushing upward, remove the cover and expose to light.
- Mist the surface morning and evening until seedlings establish; then switch to bottom-watering by pouring water into the solid tray beneath.
Temperature during germination should sit between 18 and 24°C (64 and 75°F). Below 16°C (61°F), brassica germination slows significantly; above 26°C (79°F), cilantro germination becomes erratic. A digital thermometer placed at tray level, not ambient room height, gives the accurate reading.
Light requirements for indoor growing
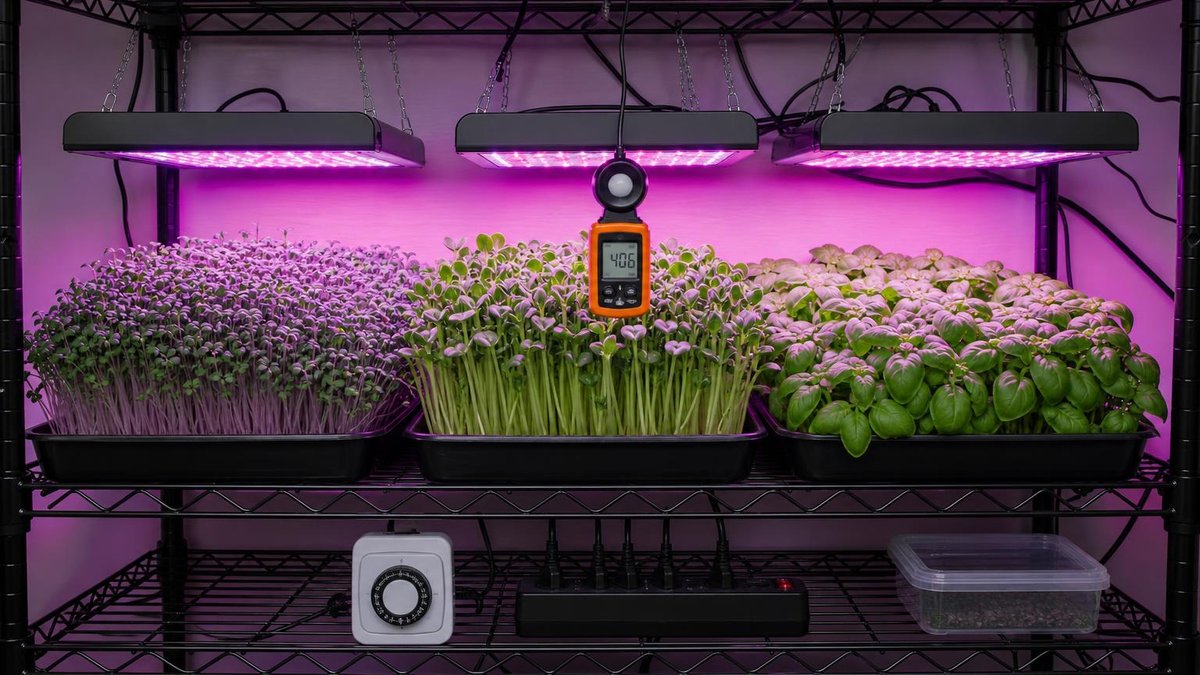
Microgreens become leggy and pale without adequate light. In a south-facing window, expect harvestable crops in winter only if you are below 40° latitude; north of that, supplemental light becomes essential from October through March.
For how to grow microgreens indoors consistently, LED fixtures with a colour temperature of 4000K to 6500K and a photosynthetic photon flux density (PPFD) of 100 to 200 micromoles per square metre per second at canopy height deliver sufficient energy without excessive heat. Position lights 15 to 30cm (6 to 12 inches) above the tray and raise them as seedlings grow. Run lights 12 to 16 hours daily; a timer prevents the irregular schedules that stress plants.
If you are selecting fixtures, our guide on how to select the right plant lights for your apartment covers spectrum, wattage, and mounting options in detail. For broader indoor growing techniques, see our article on how to grow moss indoors, which addresses humidity and light interactions relevant to small-space cultivation.
Watering and nutrient management
After germination, water from below to keep foliage dry and reduce fungal disease risk. Fill the solid tray to 1cm (0.4 inches) depth and let the substrate wick moisture upward for 10 to 15 minutes. Discard excess water; roots should never sit in standing liquid for more than 30 minutes.
For short-cycle crops harvested within 10 days, the seed’s endosperm provides sufficient nutrients. If growing past the first true leaf stage, or if using inert hydroponic mats, apply a half-strength liquid organic fertiliser (N-P-K approximately 3-1-2) once at day 7.
Harvesting and storage
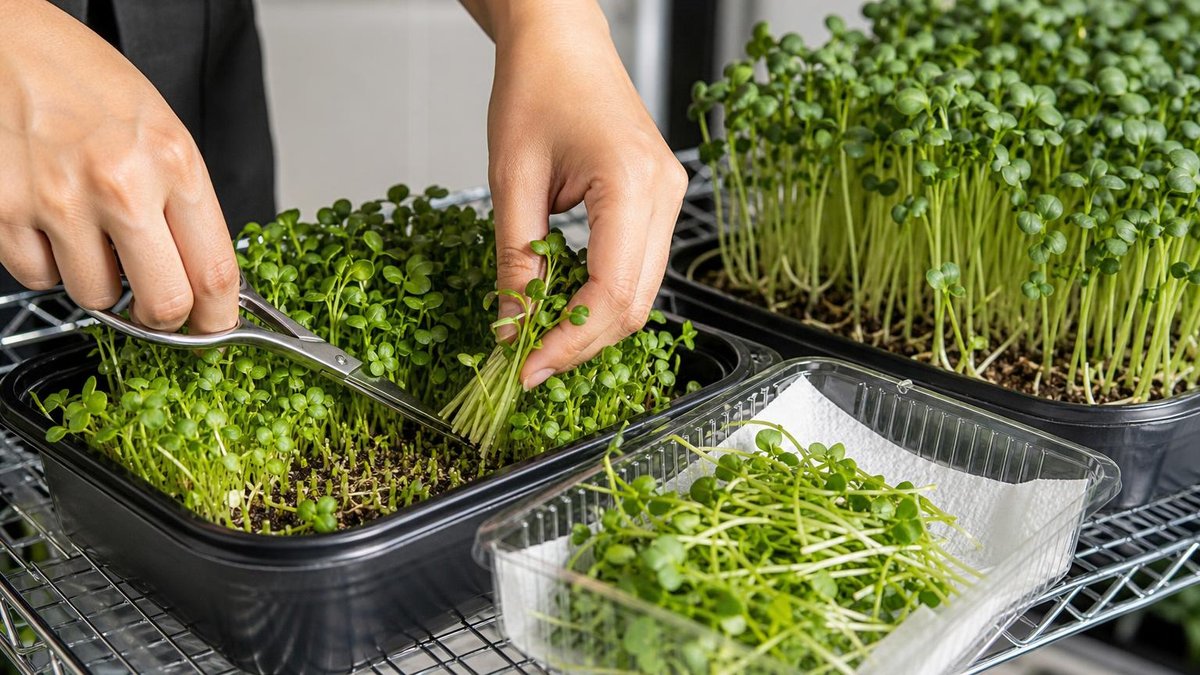
Most brassicas reach optimal harvest at the cotyledon stage, 2.5 to 5cm (1 to 2 inches) tall, before true leaves expand. Cilantro and basil develop better flavour with the first true leaves present, at 5 to 7.5cm (2 to 3 inches).
Harvest with sharp scissors or a clean harvest knife, cutting 1cm (0.4 inches) above the substrate line. Do not pull; uprooting disturbs the root mass and introduces soil or substrate particles that complicate washing. Harvest in the morning when cell turgor is highest for maximum shelf life.
Wash harvested microgreens in cold running water immediately, then spin dry in a salad spinner. Store between damp paper towels in a sealed container at 1 to 4°C (34 to 39°F). Most species maintain quality for 5 to 7 days. Do not store with ethylene-producing fruits (apples, tomatoes); exposure causes rapid yellowing and off-flavours.
Species-specific guidance
How to grow broccoli microgreens
Start with broccoli. Of all the microgreens, Brassica oleracea var. italica germinates most reliably for beginners; the seed is forgiving of slight temperature drift and sowing depth errors. Use 10 to 15g per 1020 tray. At 20 to 24°C (68 to 75°F), radicles appear in 2 to 3 days. Harvest at 7 to 10 days when cotyledons are fully open and stems measure 2.5 to 4cm (1 to 1.6 inches). The flavour is mild, faintly peppery, and unlikely to polarise.
The glucoraphanin content matters here. University of Maryland researchers measured it at 10 to 100 times the concentration found in mature broccoli florets. That precursor converts to sulforaphane, the compound behind much of broccoli’s nutritional reputation. Microgreens deliver it in a smaller package; the density, not the total volume, is what the research tracks.
How to grow cilantro microgreens
Cilantro (Coriandrum sativum) will test your patience. Germination is patchy, the cycle runs long, and temperature control is non-negotiable.
The seed coat carries soluble inhibitors that block water uptake. Soak seeds 4 to 6 hours before sowing; this single step improves uniformity more than any other intervention. Sow heavy at 25 to 30g per tray. Not every seed will germinate, and sparse patches waste your substrate. Hold temperatures at 18 to 21°C (64 to 70°F). Exceed that range and dormancy sets in. Emergence takes 7 to 10 days. Harvest at 14 to 21 days, 5 to 7.5cm (2 to 3 inches).
Cooler growing temperatures sharpen the flavour. If your space runs warm, accept milder greens or find a cooler corner.
Common problems and solutions
| Symptom | Probable cause | Corrective action |
|---|---|---|
| Leggy, pale stems | Insufficient light; PPFD below 100 | Move to brighter location or lower LED fixture to 15cm (6 inches) |
| Mould at substrate surface | Overwatering; poor air circulation; excessive seed density | Reduce watering frequency; increase spacing; remove affected trays immediately |
| Uneven germination patches | Old seed; uneven moisture; temperature fluctuation | Test germination rate on damp paper towel; pre-soak large seeds; use heat mat for consistency |
| Bitter or harsh flavour | Harvest too late; excessive fertiliser; high temperature stress | Harvest at cotyledon stage; flush substrate with plain water; improve ventilation |
If mould appears on more than 20% of the tray surface, discard the entire batch. For persistent damping-off issues, sterilise containers with a 10% bleach solution and switch to a fresh bag of substrate.
Scaling toward market production
If you are exploring best microgreens to grow for profit, start with reliable, fast-turnover crops. Broccoli, pea shoots, and sunflower rank among the best microgreens to grow for commercial beginners due to consistent germination, visual appeal, and established market recognition.
Pea shoots require pre-soaking for 8 to 12 hours and deeper substrate at 5cm (2 inches). Harvest at 10 to 15cm (4 to 6 inches) in 10 to 14 days. Sunflower needs hulled seeds and 5cm (2 inches) substrate depth; the unhulled seed coat traps moisture and rots.
Local restaurant and farmers market sales typically command £2 to £4 per 30g clamshell in UK markets, or $4 to $8 in US urban areas. Before scaling, verify your local food business registration requirements; in many jurisdictions, home kitchen production requires inspection and liability insurance for retail sale.
Frequently asked questions
Getting started
Do I need special seeds to grow microgreens?
Yes. Purchase seeds labelled for microgreen or sprout production; these are food-grade, pathogen-tested, and untreated with fungicides. Standard garden seeds may carry chemical coatings and are not intended for consumption at the seedling stage.
Can I reuse substrate after harvesting microgreens?
No. The root mass and stubble decompose rapidly, creating anaerobic pockets and disease habitat. Compost spent substrate if it is organic material. Fresh substrate for each crop is non-negotiable for food safety.
Growing conditions and techniques
How much light do microgreens need indoors?
Microgreens need 12 to 16 hours of light daily at a PPFD of 100 to 200 micromoles per square metre per second. A south-facing window provides sufficient intensity only in spring and summer for most latitudes; supplemental LED lighting ensures consistent results year-round for how to grow microgreens at home reliably. See our guidance on how to select the right plant lights for your apartment for fixture selection.
Why are my microgreens falling over and dying after germination?
This symptom, damping-off, stems from fungal infection promoted by excess moisture and poor air movement. Prevention matters more than cure: sow at correct density, water from below after day 3, and ensure air circulates between trays. Once stems collapse at the soil line, the crop is lost; remove and sanitise equipment before restarting.
Is it safe to grow microgreens without soil?
Hydroponic microgreen production is safe when you use food-grade fibre mats, maintain clean water, and harvest with sanitised tools. The absence of soil eliminates some pathogens but introduces others if standing water persists. For how to grow microgreens without soil successfully, rigour in hygiene replaces the buffering capacity that compost provides.
How do microgreens differ from sprouts?
Microgreens grow in light with leaves photosynthesising; sprouts germinate in dark, humid conditions and are consumed whole including the root. This growing environment difference means sprouts carry higher risk of bacterial contamination, which is why many jurisdictions restrict raw sprout sales. If you are learning how to grow sprouts and microgreens, treat them as distinct processes with different safety protocols.
Can I grow microgreens on a windowsill in winter?
Only if you are in a mild climate with significant winter daylight hours. For most growers above 35° latitude, natural light in December and January falls below the threshold for stocky growth. Supplemental LED lighting becomes essential; without it, expect pale, elongated seedlings that lack flavour intensity and shelf life.
Sources
- University of Maryland Extension, 2022. “Microgreens: Production, Shelf Life, and Nutrition.” https://extension.umd.edu/resource/microgreens-production-shelf-life-and-nutrition
- Cornell University Cooperative Extension, 2021. “Growing Microgreens for Home and Market.” https://cpb-us-e1.wpmucdn.com/blogs.cornell.edu/dist/0/7265/files/2021/03/Growing-Microgreens-2021.pdf
- USDA Agricultural Research Service, 2014. “Microgreens: Tiny, But Powerful.” https://www.ars.usda.gov/news-events/news/research-news/2014/microgreens/
- Xiao, Z., Lester, G.E., Luo, Y., & Wang, Q., 2012. “Assessment of Vitamin and Carotenoid Concentrations of Emerging Food Products: Edible Microgreens.” Journal of Agricultural and Food Chemistry, 60(31), 7644-7651. https://pubs.acs.org/doi/10.1021/jf300459b
- ASPCA, 2024. “Toxic and Non-Toxic Plants: General guidance on plant ingestion.” https://www.aspca.org/pet-care/animal-poison-control
